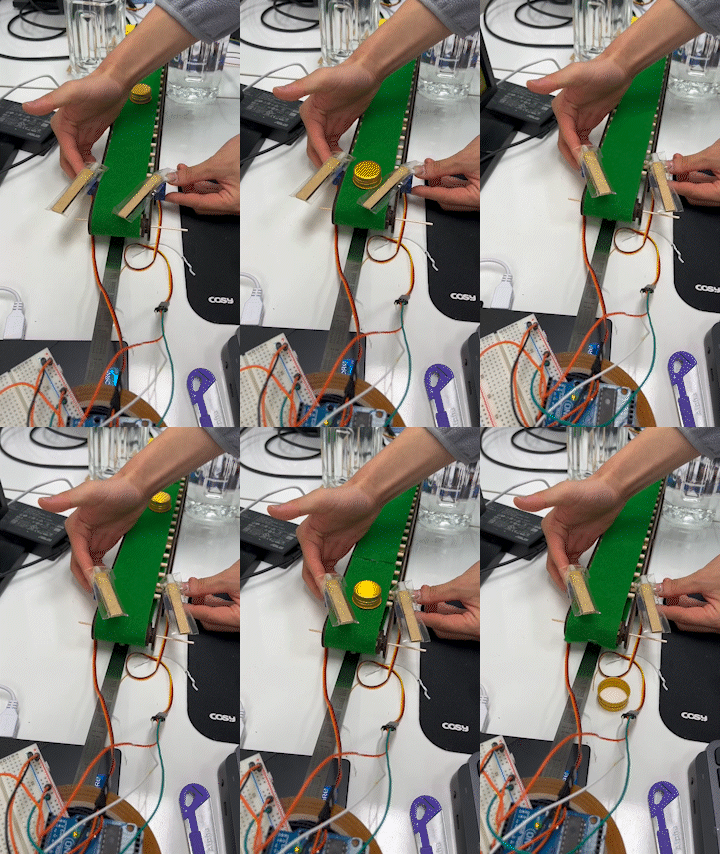
우선 서브모터
구현코드를 가져왔고
회로는 다음처럼 접속하였음

서브모터를 구동하는 코드인데
일단은 분류를 하기위해서
오프셋을 맞추고

이전에 만들었던 코드에 시리얼 통신을 구현하고
import sys
import numpy as np
import cv2

import serial
import time

cap = cv2.VideoCapture(0)
if not cap.isOpened():
    print("열리지 않아요")
    sys.exit()

ser = serial.Serial('/dev/ttyACM0', 9600)
count = 0
de_count = 0
radius_list = []

munjang = "not detect"
R = 255
G = 255
B = 255

while True:
    ret, frame = cap.read()
    if not ret:
        break

    gray = cv2.cvtColor(frame, cv2.COLOR_BGR2GRAY)
    blr = cv2.GaussianBlur(gray, (0, 0), 1.0)
    # 이미지의 잡음을 제거한다.


    # 실질적인 허프변환이 시작되는 부분
    circles = cv2.HoughCircles(blr, cv2.HOUGH_GRADIENT, 1, 50, param1=120, param2=40, minRadius=10, maxRadius=80)
    # 반지름과 threshold를 조절하면서 확인해볼 분이다.


    dst = frame.copy()
    # 이미지를 복사해서 dst에 저장한다.

    cv2.imshow('img', frame)

    # 원을 검출할 때 실행된다.
    if circles is not None:
        cv2.putText(dst, munjang, org=(0, 30),
        fontFace=cv2.FONT_HERSHEY_SIMPLEX, fontScale=1,
        color=(R,G,B),thickness=1, lineType=cv2.LINE_AA)
        cx, cy, radius = circles[0][0]
        cv2.circle(dst, (int(cx), int(cy)), int(radius), (255, 0, 0), 2, cv2.LINE_AA)
        cv2.putText(dst, str(radius), org=(int(cx), int(cy)),
        fontFace=cv2.FONT_HERSHEY_SIMPLEX, fontScale=1,
        color=(0,0,255),thickness=3, lineType=cv2.LINE_AA)
        radius_list.append(radius)
        count += 1
        print(count)

        if count == 5:
            val_radius = np.average(radius_list)
            if np.average(radius_list) >= 25 and np.average(radius_list) <= 31:
                munjang = "pass  (" + str(np.average(radius_list)) + ")"
                val = "1/"
                #val = "pass," + str(np.average(radius_list))
                R = 255
                G = 0
                B = 255
            else:
                munjang = "fail  (" + str(np.average(radius_list)) + ")"
                val = "0/"
                #val = "fail," + str(np.average(radius_list))
                R = 0
                G = 0
                B = 255

            val = val.encode('utf-8')
            ser.write(val)
            radius_list.clear()
            count = 0
        de_count = 0

        time.sleep(0.1)

    else:
        cv2.putText(dst, munjang, org=(0, 30),
        fontFace=cv2.FONT_HERSHEY_SIMPLEX, fontScale=1,
        color=(R,G,B),thickness=1, lineType=cv2.LINE_AA)

        de_count += 1
        if de_count == 5:
            munjang = "not detect"
            R = 255
            G = 255
            B = 255
            de_count = 0
            count = 0
        time.sleep(0.1)


    cv2.imshow('img', dst)
    key = cv2.waitKey(1)

    if key == 27:
        break


cap.release()
cv2.destroyAllWindows()
코드와 아두이노 코드
#include <Servo.h>

#define servoPin1 9
#define servoPin2 10
Servo servo1;
Servo servo2;

int angle=0;
String come;

void setup() {
  // put your setup code here, to run once:
  Serial.begin(9600);

  servo1.attach(servoPin1);
  servo2.attach(servoPin2);

  servo1.write(90);
  servo2.write(90);
}

void loop() {
  //put your main code here, to run repeatedly:
  // To the Left, classification
  while(Serial.available()){
    String come = Serial.readStringUntil('/');
    if(come == "1"){
      servo1.write(120);
      servo2.write(115);
      delay(100);
    }
    else if(come == "0"){
// To the Right, classification
    servo1.write(75);
    servo2.write(75);

    delay(100);
    }
  }
}
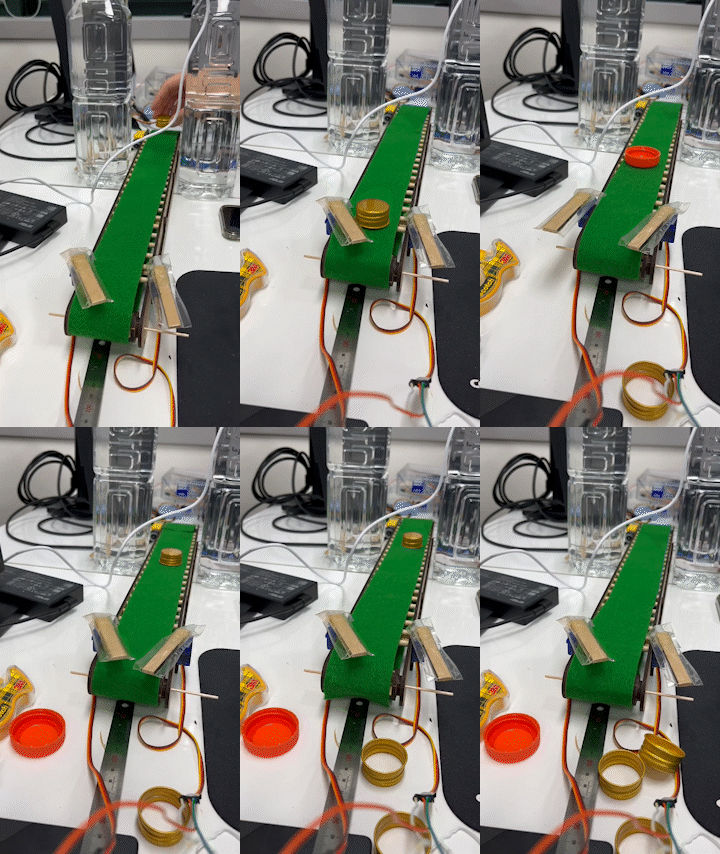
결과물

'취업전 프로젝트 > TEAM_스마트 팩토리' 카테고리의 다른 글
| 8. 프로젝트 중간 보고서 (0) | 2023.01.02 |
|---|---|
| 7. 레이저 센서 구현하기 , 초음파 센서 합치기 (0) | 2023.01.02 |
| 5. 컨베이어 벨트와 합치는 중 (0) | 2022.12.30 |
| 4. 원을 검출하고 이를 시리얼 통신으로 아두이노 LCD에 기록하자. (0) | 2022.12.29 |
| 3. 아두이노와 파이썬코드의 시리얼 통신 구현하기 (0) | 2022.12.29 |