First steps - CARLA Simulator
First steps with CARLA The CARLA simulator is a comprehensive solution for producing synthetic training data for applications in autonomous driving (AD) and also other robotics applications. CARLA simulates a highly realistic environment emulating real wor
carla.readthedocs.io
의미론적 분할 카메라라고 하는 것을 생성하려면 다음을 입력합니다.
(instance_segmentation)
instance_camera_bp = world.get_blueprint_library().find('sensor.camera.instance_segmentation')import carla
import random
import time
import queue
# Connect to client and set CARLA server to synchronous mode
client = carla.Client('localhost', 2000)
world = client.get_world()
settings = world.get_settings()
#settings.synchronous_mode = True
world.apply_settings(settings)참고로 동기화모드로 설정이되면 하고, 저처럼 오류가나면 안해도됩니다만 Bounding Box부분에서 시간이 일치하지 않는 오류가 있습니다.
# Get the map spawn points and the spectator
spawn_points = world.get_map().get_spawn_points()
spectator = world.get_spectator()

# Set the camera to some location in the map
cam_location = carla.Location(x=-46., y=152, z=18)
cam_rotation = carla.Rotation(pitch=-21, yaw=-93.4, roll=0)
camera_transform = carla.Transform(location=cam_location, rotation=cam_rotation)
spectator.set_transform(camera_transform)

# Retrieve the semantic camera blueprint and spawn the camera
instance_camera_bp = world.get_blueprint_library().find('sensor.camera.instance_segmentation')
instance_camera = world.try_spawn_actor(instance_camera_bp, camera_transform)
이제 지도의 원하는 지점에 센서를 설치했습니다.
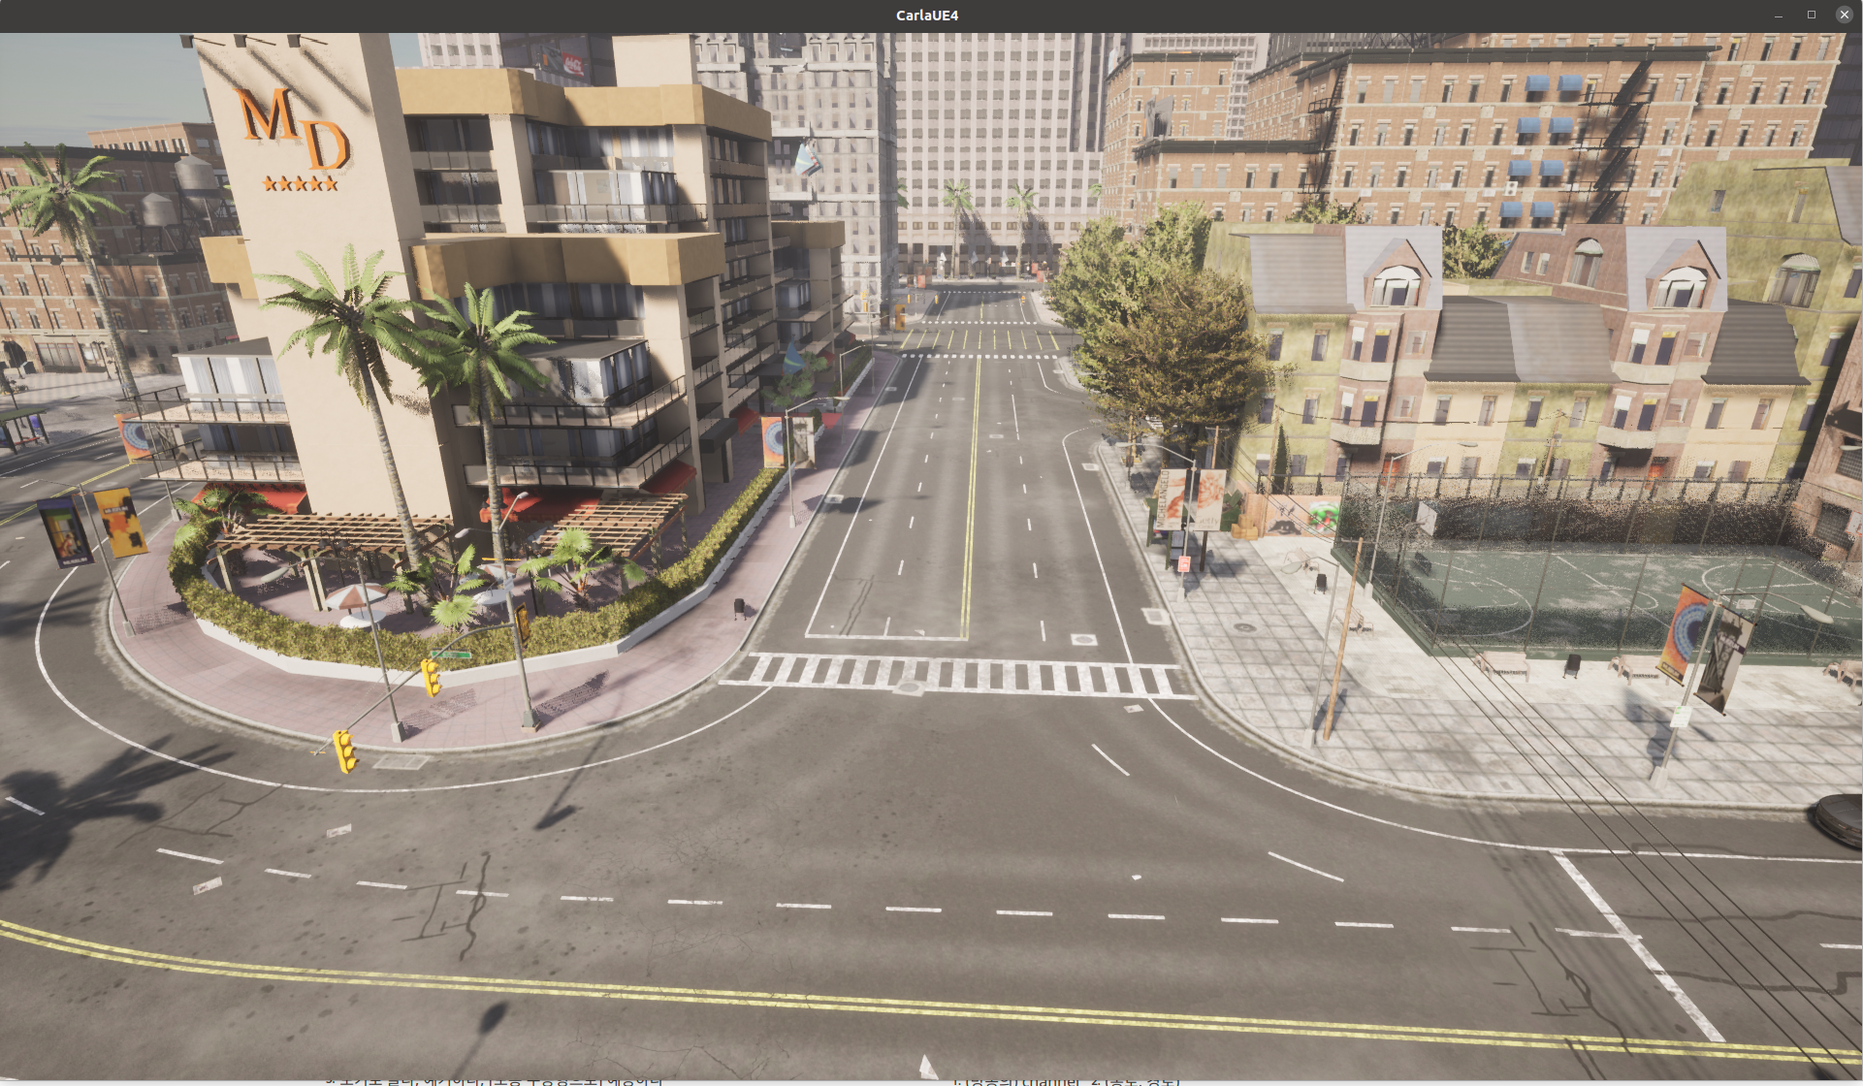
이제 이 주변에 차량이나 보행자를 생성해서 채웁니다.
# Spawn vehicles in an 80m vicinity of the camera
vehicle_bp_library = world.get_blueprint_library().filter('*vehicle*')
radius = 80
for spawn_point in spawn_points:
    vec = [spawn_point.location.x - cam_location.x, spawn_point.location.y - cam_location.y]
    if vec[0]*vec[0] + vec[1]*vec[1] < radius*radius:
        world.try_spawn_actor(random.choice(vehicle_bp_library), spawn_point)
world.tick()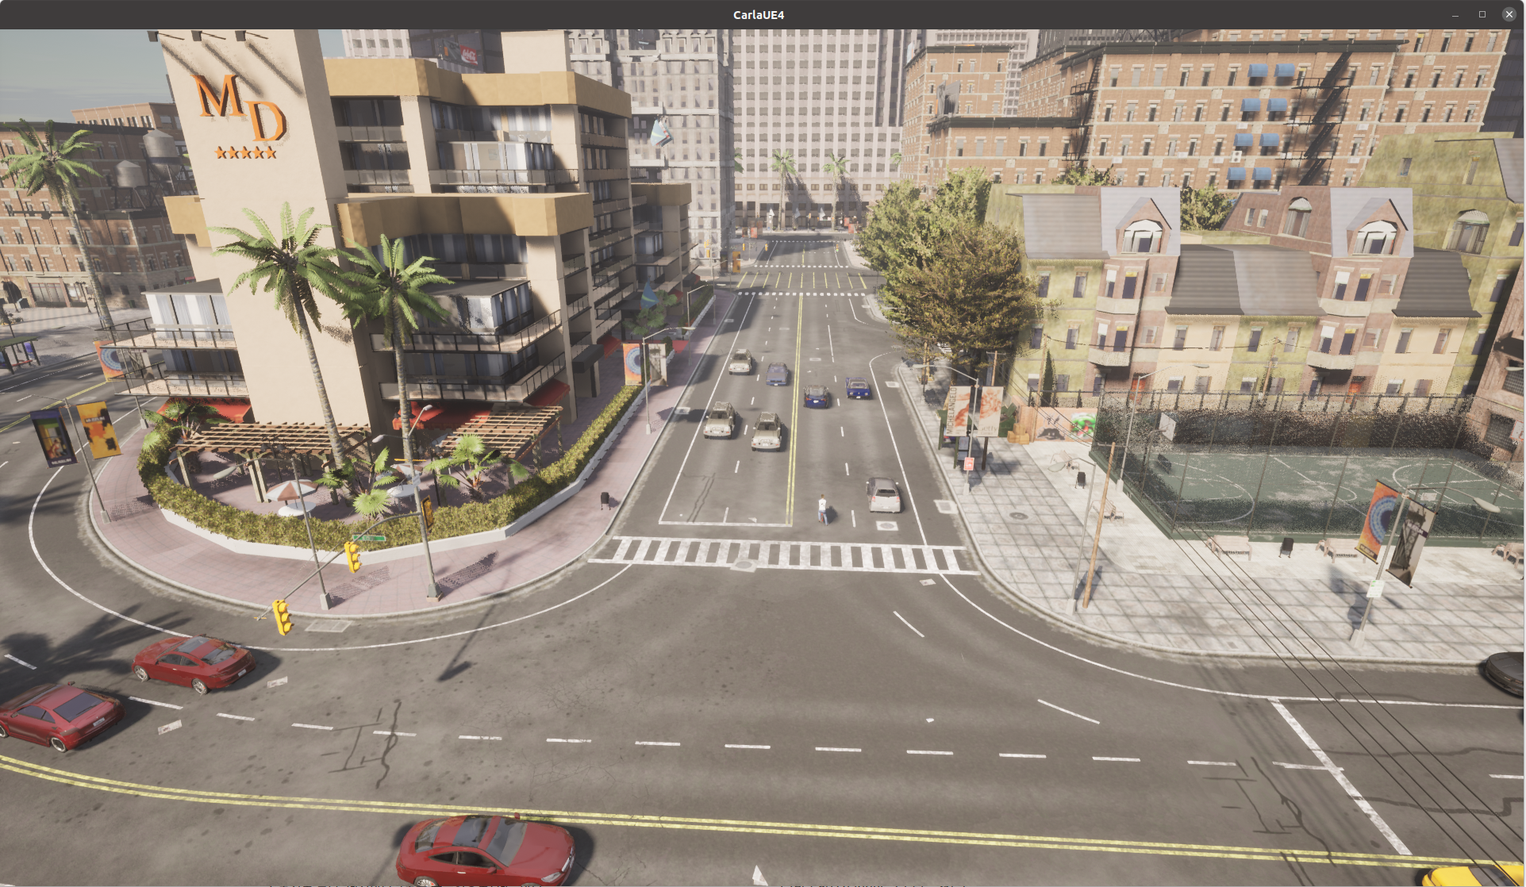
이제 Segementation된 이미지를 생성합니다.
# Save the image to disk
instance_image_queue = queue.Queue()
instance_camera.listen(instance_image_queue.put)
world.tick()
instance_image=instance_image_queue.get()
instance_image.save_to_disk('instance_segmentation.png')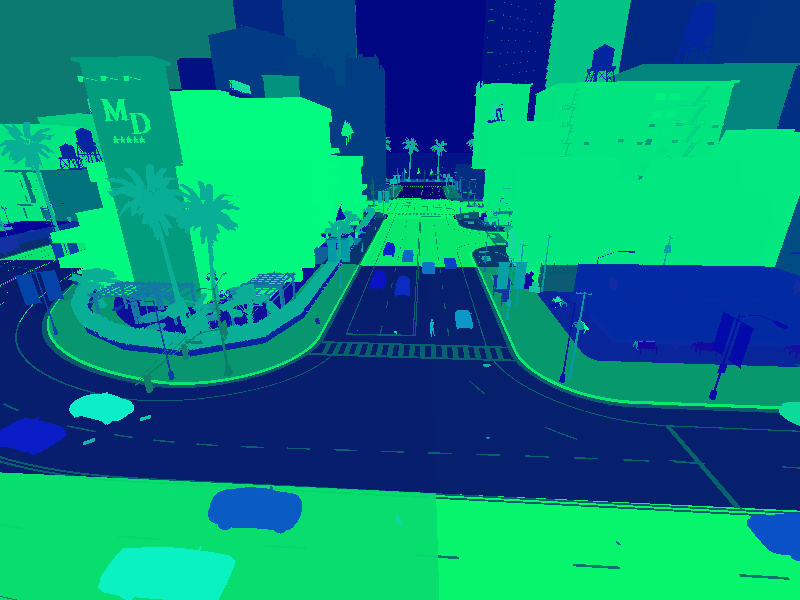
다음은 Bounding 박스에 대한 부분입니다.
import carla
import math
import random
import time
import queue
import numpy as np
import cv2

client = carla.Client('localhost', 2000)
world  = client.get_world()
bp_lib = world.get_blueprint_library()

# Set up the simulator in synchronous mode
settings = world.get_settings()
#settings.synchronous_mode = True # Enables synchronous mode
#settings.fixed_delta_seconds = 0.05
world.apply_settings(settings)
# 왜인지 모르게 작동을 안하니 주의합니다.

# Get the map spawn points
spawn_points = world.get_map().get_spawn_points()

# spawn vehicle
vehicle_bp =bp_lib.find('vehicle.lincoln.mkz_2020')
vehicle = world.try_spawn_actor(vehicle_bp, random.choice(spawn_points))

# spawn camera
camera_bp = bp_lib.find('sensor.camera.rgb')
camera_init_trans = carla.Transform(carla.Location(z=2))
camera = world.spawn_actor(camera_bp, camera_init_trans, attach_to=vehicle)
vehicle.set_autopilot(True)

# Create a queue to store and retrieve the sensor data
image_queue = queue.Queue()
camera.listen(image_queue.put)
자동차 한대가 스폰이 됩니다. 이제 카메라 캘리브레이션을 진행합니다.
def build_projection_matrix(w, h, fov):
    focal = w / (2.0 * np.tan(fov * np.pi / 360.0))
    K = np.identity(3)
    K[0, 0] = K[1, 1] = focal
    K[0, 2] = w / 2.0
    K[1, 2] = h / 2.0
    return K
def get_image_point(loc, K, w2c):
# Calculate 2D projection of 3D coordinate
# Format the input coordinate (loc is a carla.Position object)
point = np.array([loc.x, loc.y, loc.z, 1])
# transform to camera coordinates
point_camera = np.dot(w2c, point)
# New we must change from UE4's coordinate system to an "standard"
# (x, y ,z) -> (y, -z, x)
# and we remove the fourth componebonent also
point_camera = [point_camera[1], -point_camera[2], point_camera[0]]
# now project 3D->2D using the camera matrix
point_img = np.dot(K, point_camera)
# normalize
point_img[0] /= point_img[2]
point_img[1] /= point_img[2]
return point_img[0:2]# Get the world to camera matrix
world_2_camera = np.array(camera.get_transform().get_inverse_matrix())
# Get the attributes from the camera
image_w = camera_bp.get_attribute("image_size_x").as_int()
image_h = camera_bp.get_attribute("image_size_y").as_int()
fov = camera_bp.get_attribute("fov").as_float()
# Calculate the camera projection matrix to project from 3D -> 2D
K = build_projection_matrix(image_w, image_h, fov)
이제 사용을 하면 됩니다.
actor.get_world_vertices(actor.get_transform())# Retrieve all bounding boxes for traffic lights within the level
bounding_box_set = world.get_level_bbs(carla.CityObjectLabel.TrafficLight)
# Filter the list to extract bounding boxes within a 50m radius
nearby_bboxes = []
for bbox in bounding_box_set:
if bbox.location.distance(actor.get_transform().location) < 50:
nearby_bboxesedges = [[0,1], [1,3], [3,2], [2,0], [0,4], [4,5], [5,1], [5,7], [7,6], [6,4], [6,2], [7,3]]
위의 코드를 사용합니다.
# Set up the set of bounding boxes from the level
# We filter for traffic lights and traffic signs
bounding_box_set = world.get_level_bbs(carla.CityObjectLabel.TrafficLight)
bounding_box_set.extend(world.get_level_bbs(carla.CityObjectLabel.TrafficSigns))

# Remember the edge pairs
edges = [[0,1], [1,3], [3,2], [2,0], [0,4], [4,5], [5,1], [5,7], [7,6], [6,4], [6,2], [7,3]]
이제 Bounding Box를 보려면 OpenCV창으로 확인합니다.
# Retrieve the first image
world.tick()
image = image_queue.get()

# Reshape the raw data into an RGB array
img = np.reshape(np.copy(image.raw_data), (image.height, image.width, 4))

# Display the image in an OpenCV display window
cv2.namedWindow('ImageWindowName', cv2.WINDOW_AUTOSIZE)
cv2.imshow('ImageWindowName',img)
cv2.waitKey(1)
while True:
# Retrieve and reshape the image
world.tick()
image = image_queue.get()
img = np.reshape(np.copy(image.raw_data), (image.height, image.width, 4))
# Get the camera matrix
world_2_camera = np.array(camera.get_transform().get_inverse_matrix())
for bb in bounding_box_set:
# Filter for distance from ego vehicle
if bb.location.distance(vehicle.get_transform().location) < 50:
# Calculate the dot product between the forward vector
# of the vehicle and the vector between the vehicle
# and the bounding box. We threshold this dot product
# to limit to drawing bounding boxes IN FRONT OF THE CAMERA
forward_vec = vehicle.get_transform().get_forward_vector()
ray = bb.location - vehicle.get_transform().location
if forward_vec.dot(ray) > 1:
# Cycle through the vertices
verts = [v for v in bb.get_world_vertices(carla.Transform())]
for edge in edges:
# Join the vertices into edges
p1 = get_image_point(verts[edge[0]], K, world_2_camera)
p2 = get_image_point(verts[edge[1]], K, world_2_camera)
# Draw the edges into the camera output
cv2.line(img, (int(p1[0]),int(p1[1])), (int(p2[0]),int(p2[1])), (0,0,255, 255), 1)
# Now draw the image into the OpenCV display window
cv2.imshow('ImageWindowName',img)
# Break the loop if the user presses the Q key
if cv2.waitKey(1) == ord('q'):
break
# Close the OpenCV display window when the game loop stops
cv2.destroyAllWindows()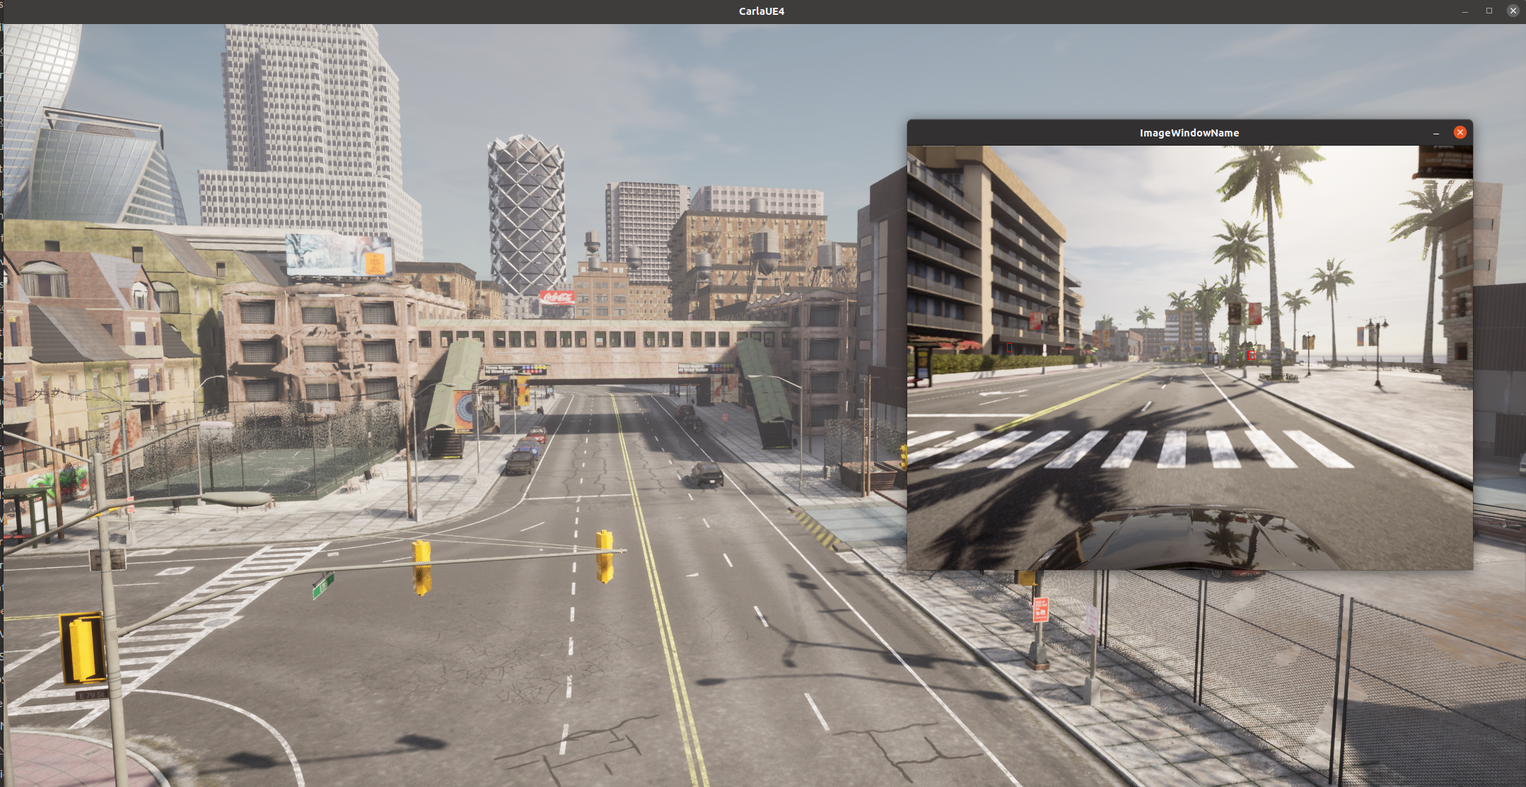
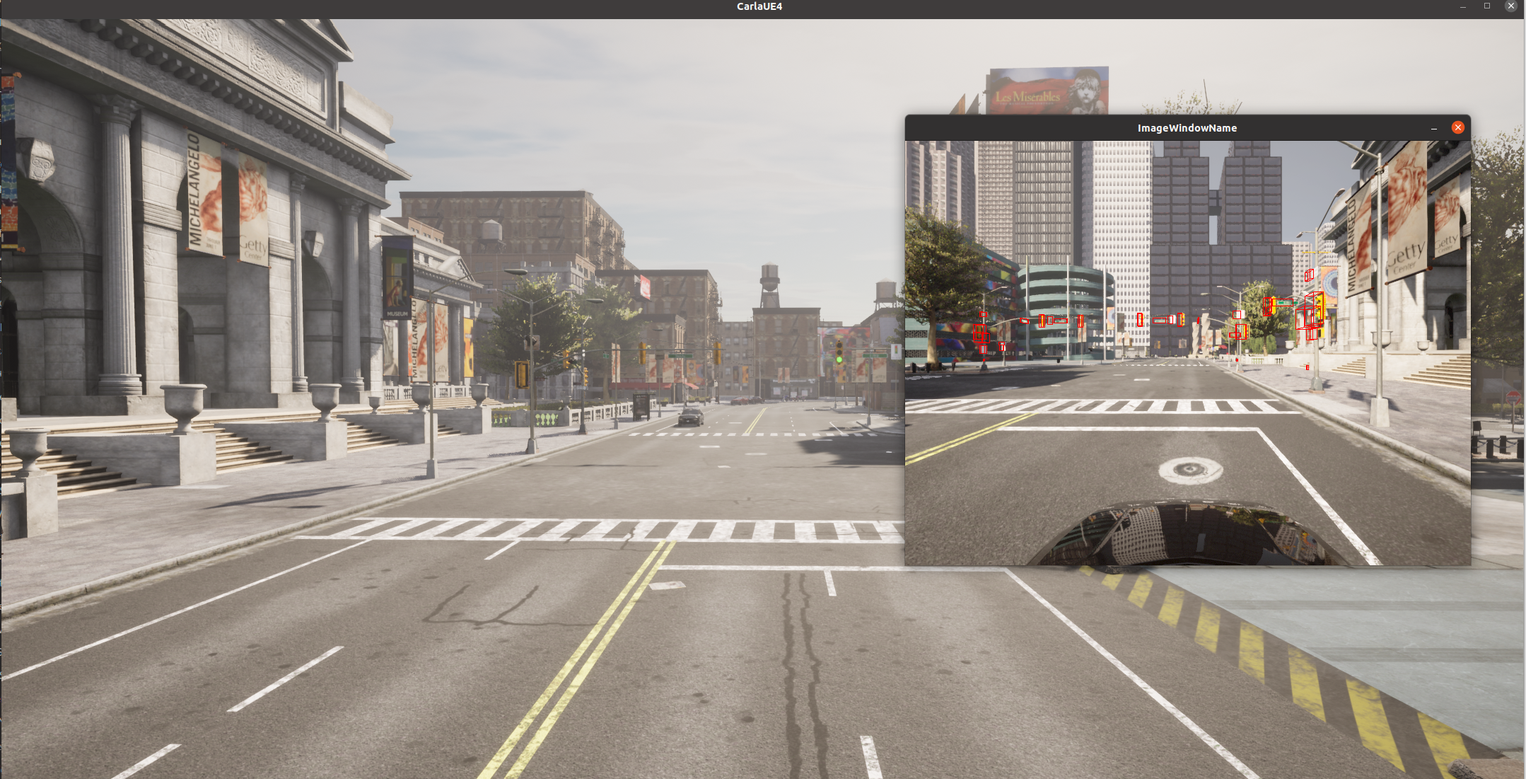
동기화때문에 오류가 조금 있습니다. 바운딩박스가 조금 늦게 도착합니다.
추가로 차량이나 보행자에게도 Bounding Box를 넣을 수 있습니다.
그러므로 차량을 추가합니다.
for i in range(50):
    vehicle_bp = random.choice(bp_lib.filter('vehicle'))
    npc = world.try_spawn_actor(vehicle_bp, random.choice(spawn_points))
    if npc:
        npc.set_autopilot(True)
# Retrieve the first image
world.tick()
image = image_queue.get()
# Reshape the raw data into an RGB array
img = np.reshape(np.copy(image.raw_data), (image.height, image.width, 4))
# Display the image in an OpenCV display window
cv2.namedWindow('ImageWindowName', cv2.WINDOW_AUTOSIZE)
cv2.imshow('ImageWindowName',img)
cv2.waitKey(1)while True:
# Retrieve and reshape the image
world.tick()
image = image_queue.get()
img = np.reshape(np.copy(image.raw_data), (image.height, image.width, 4))
# Get the camera matrix
world_2_camera = np.array(camera.get_transform().get_inverse_matrix())
for npc in world.get_actors().filter('*vehicle*'):
# Filter out the ego vehicle
if npc.id != vehicle.id:
bb = npc.bounding_box
dist = npc.get_transform().location.distance(vehicle.get_transform().location)
# Filter for the vehicles within 50m
if dist < 50:
# Calculate the dot product between the forward vector
# of the vehicle and the vector between the vehicle
# and the other vehicle. We threshold this dot product
# to limit to drawing bounding boxes IN FRONT OF THE CAMERA
forward_vec = vehicle.get_transform().get_forward_vector()
ray = npc.get_transform().location - vehicle.get_transform().location
if forward_vec.dot(ray) > 1:
p1 = get_image_point(bb.location, K, world_2_camera)
verts = [v for v in bb.get_world_vertices(npc.get_transform())]
for edge in edges:
p1 = get_image_point(verts[edge[0]], K, world_2_camera)
p2 = get_image_point(verts[edge[1]], K, world_2_camera)
cv2.line(img, (int(p1[0]),int(p1[1])), (int(p2[0]),int(p2[1])), (255,0,0, 255), 1)
cv2.imshow('ImageWindowName',img)
if cv2.waitKey(1) == ord('q'):
break
cv2.destroyAllWindows()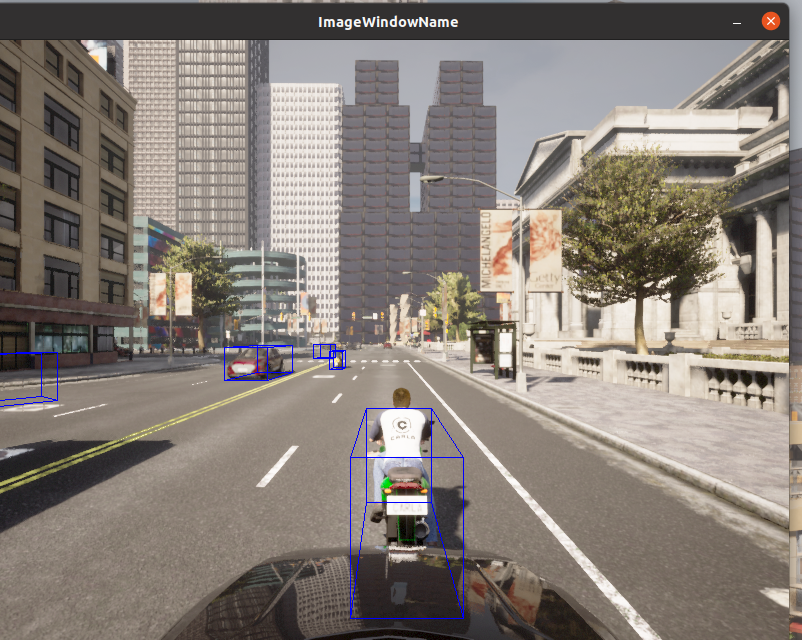
뭐 이런 데이터를 CoCo Data 형식으로 뺄 수도 있다는 것 같은데, (YoLo) 저는 이 분야는 잘 모르겠습니다.
'공부#Robotics#자율주행 > carla' 카테고리의 다른 글
| ROS-CARLA Bridge 사용해보기 (0) | 2023.04.30 |
|---|---|
| (CARLA) 2. 도로의 Traffic을 제어하는 방법 (0) | 2023.04.30 |
| (CARLA) 1. PythonAPI를 이용해서 CARLA 사용하기 (0) | 2023.04.30 |
| (Ubuntu) 우분투에 CARLA 설치하는 방법 및 활용법 (0) | 2023.04.30 |
| (자율주행 시뮬레이터) 우분투 20.04에 Carla 를 설치하고, 객체를 소환시켜보자. (0) | 2023.03.13 |